If your team is a beginner in 3D design you may wish to create your 3D Design using Autodesk Tinkercad.
 Start designing
Tinkercad is a free, easy-to-use web-based app for 3D design.
Are you new to 3D Design? Do not worry; follow the instructions below to create an account and start learning about 3D design following the step-by-step tutorials.
Below you can find information about:
- Creating an account
- Designing together
- Navigating the User Interface
1. Creating an Account
Tinkercad is a free, easy-to-use web-based app for 3D design.
1. Go to: https://www.tinkercad.com/ and create an account by clicking “JOIN NOW”.

2. Choose the option “educator” to create an account. If you are a student, choose the option “student” to join a class with the code provided by your educator.
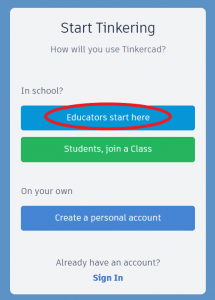
3. To sign up as an educator:
- Read the Children’s Privacy Statement and the Terms of Service and agree to proceed.
- Fill in your profile information.
4. You are now ready to use the platform.
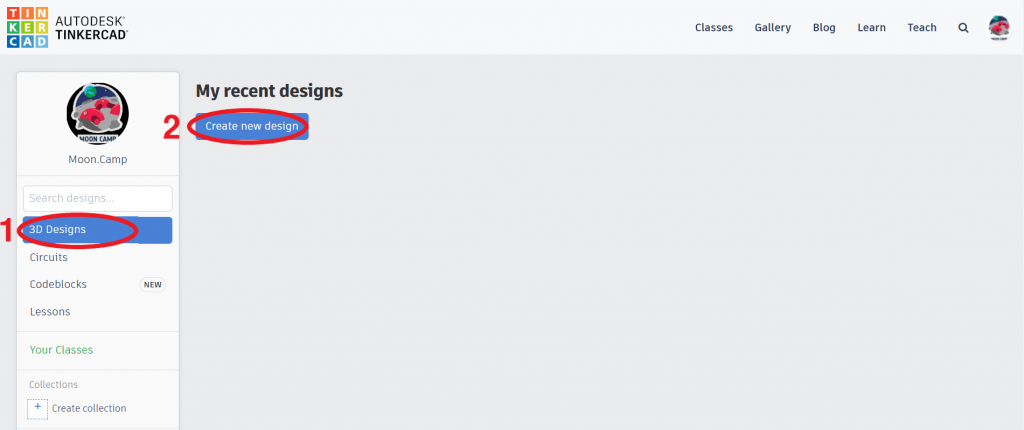
To create a new 3D design go to “3D Designs” (1) and then “Create new design” (2).
You will be taken to the design interface. You can now edit your new 3D design.
2. Designing together
Creating a virtual classroom for your students.
Using this option, the students will not have to create a personal account.
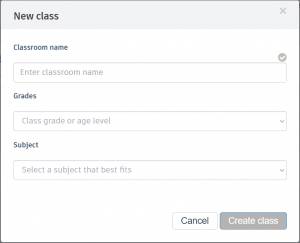
1. Sign in as an educator. Choose the top menu “Classes”, then select “Create new class” and fill in the details for your classroom.
2. Add the names of the students and create nicknames. Each student will need to use the given nickname to sign in to the classroom.
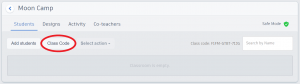
3. Generate a “Class code” when you are inside the classroom, for your students to join in.
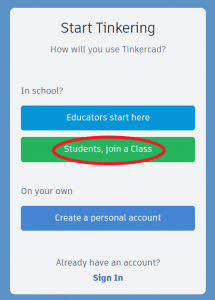
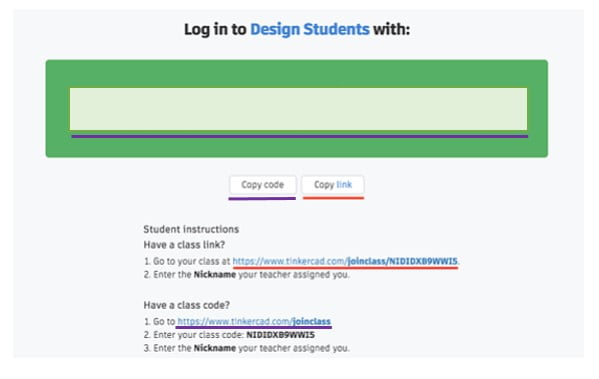
4. The students will now be able to join the classroom by going to https://www.tinkercad.com/. Select the option “Join Now” and “Students, join your class”. They will have to enter their nickname and the class code, or by opening the class link.
Now the students can create their own designs using the design interface. The teacher has access to the students’ designs in the virtual classroom and can view and copy them.
Working in the same project
- Once you clicked “Create new design” you access the designing interface. Here it is possible to change the name of the project (1).
- The students can do collaborative work on the same project at the same time, also if they are working remotely. The owner of a 3D design can invite other students by sending them the generated link via e-mail (2).
- The link will provide access to the project for 336 hours (14 days). Afterwards a new invite has to be created.
Important note: The students do not have to have a private account for using this function, they can log in using the classroom code and their given nickname at any time to design their Moon Camp.

If you finished your design, follow the steps below or watch this short video to share your project link with us:
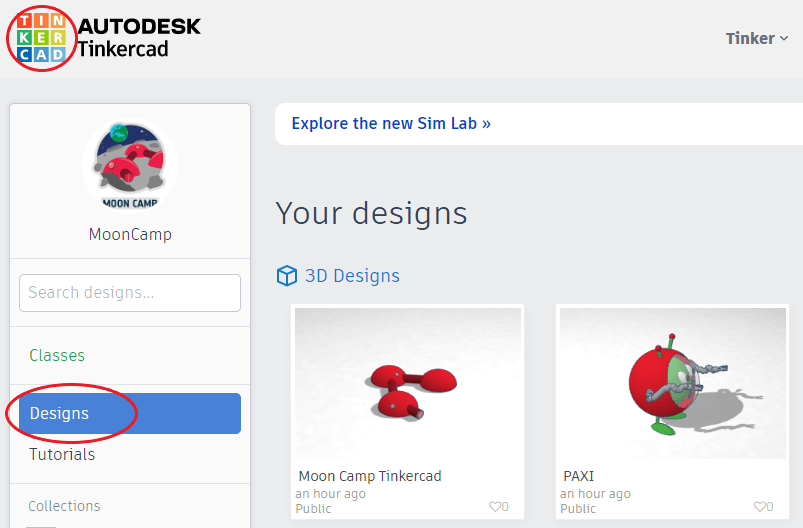
1. Visit your Tinkercad dashboard by pressing the Tinkercad logo on the top left side. In the dashboard you have access to all your designs.
Attention: If you as a teacher created a Class for your students, visit this Class to enter the student’s dashboard from your account! Make sure that Safe Mode is turned off in your classroom by clicking on the green shield in the top right corner, and ensuring that it is grey which will allow you to make the student’s projects public. Please note that if you as the teacher have also joined a class as a student, then you will not be able to change this feature. Please remove yourself from all classes as a student, then enter the class as a teacher and turn off safe mode.

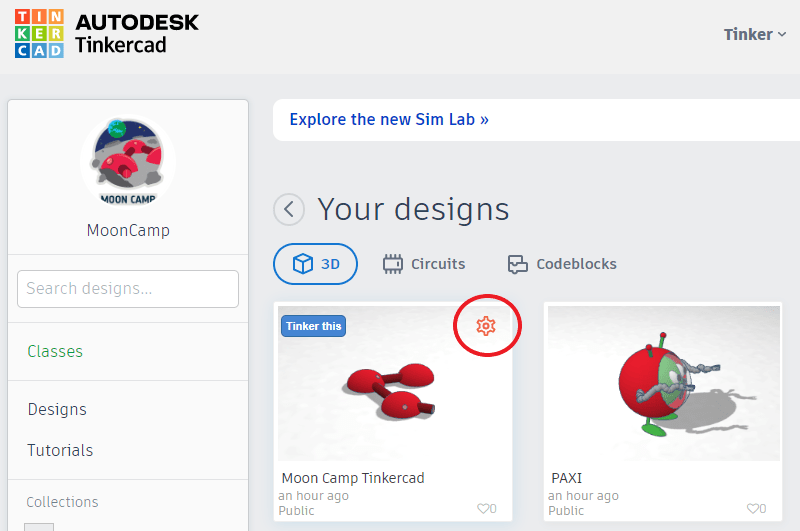
2. Pass the mouse on top of the project you want to share. Select the options wheel on the top right corner. Go to Properties.
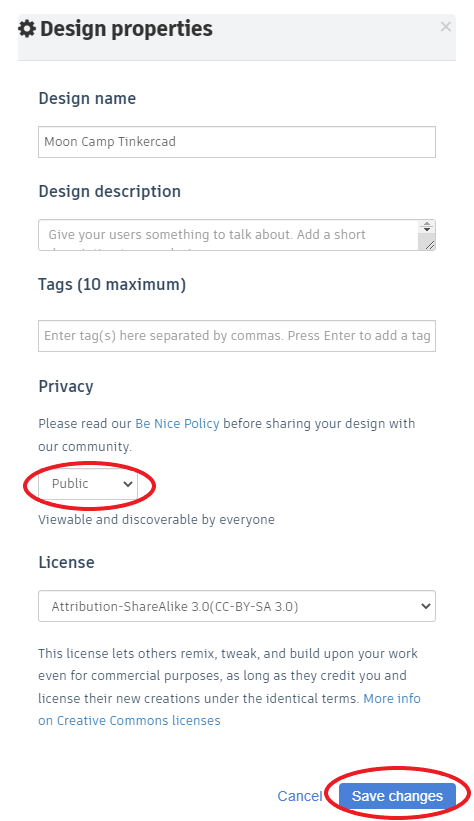
3. On the Privacy setting change the setting from Private to Public. Keep the license as Attribution-ShareAlike 3.0 (CC-BY-SA 3.0). Save changes.
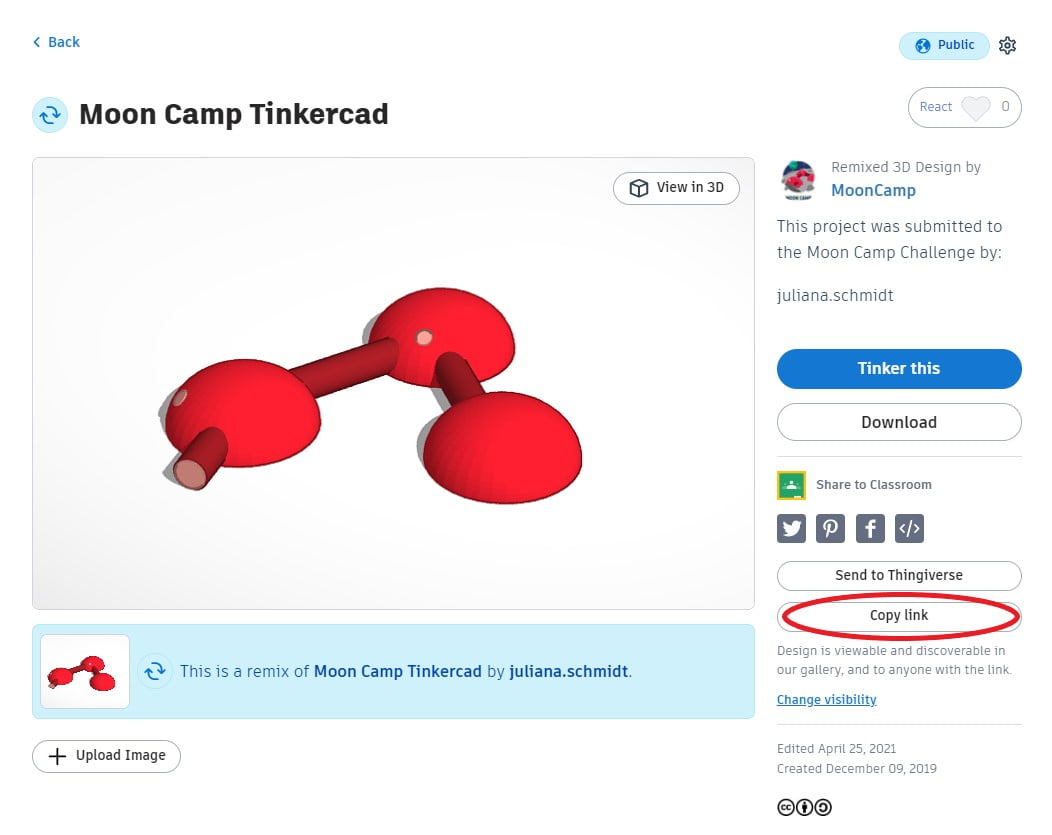
4. On the dashboard select the project you want to share by clicking on the project. The public page of the project should look similar to the image below. Share the public link with us by clicking on Copy Link.